

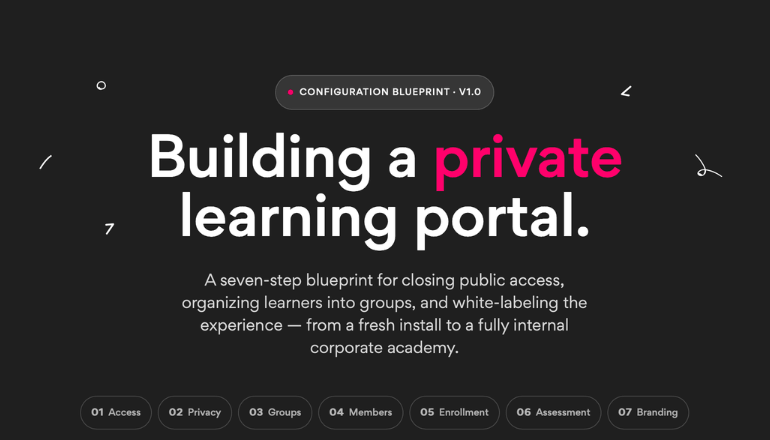
If your company runs training internally — onboarding new hires, upskilling teams, certifying compliance — you don't need a public course catalog or open enrollment. What you need is a locked-down, branded environment where only your people can log in, only your courses are visible, and you can track exactly who completed what.
eProfessor handles all of this, but the out-of-the-box configuration leans toward course sales. A few targeted settings flip it into a proper internal training hub. This guide walks you through the full setup.
What "internal training mode" actually means
There's no single toggle labeled "internal mode." Instead, you're configuring a handful of independent settings that together produce the right result: no public registration, no public catalog, learners organized into groups that automatically get access to the right courses, and reporting that lets managers see progress by team.
The setup takes about 30 to 60 minutes from a fresh instance.
Step 1: Restrict self-registration
By default, anyone who lands on your eProfessor site can create an account. For internal training, that's a problem. Go to Settings → Registration and disable public sign-up. You have two options from there: invite-only (learners receive an email link to create their account) or admin-created (you create accounts manually or via bulk import). Most organizations with an existing employee directory prefer the bulk import route — more on that in step 4.
Step 2: Remove courses from the public catalog
Even with registration restricted, course pages can still be indexed or shared by URL. Lock this down at the course level: open each course, go to Visibility, and set it to Private or Unlisted. Private courses require enrollment to access. Unlisted courses are accessible by direct link but won't appear in any catalog listing.
If you have a catalog page enabled in your site settings, disable it — there's nothing useful for an internal audience to browse there.
Step 3: Create learner groups
Groups are the organizing unit for internal training. Instead of enrolling individual users in individual courses, you enroll groups. Everyone in the group gets access; when someone joins or leaves the group, their course access updates automatically.
Go to Users → Groups → New Group and create groups that reflect how your organization actually works. Common structures:
- By department: Sales, Engineering, Customer Support
- By cohort: New Hires Jan 2025, Leadership Track Q2
- By compliance requirement: HIPAA Required, Safety Certification
You can assign one user to multiple groups if they need to complete training from more than one category.
Step 4: Add learners to groups
If your organization is small, adding learners manually is straightforward. For larger teams, bulk CSV import is faster. The import file needs first name, last name, and email at minimum — eProfessor creates the accounts and you assign them to groups during or after import.
If accounts don't exist yet, the invite-by-email flow from step 1 kicks in here: learners receive an email with a link to set their password and land directly in their assigned courses.
Step 5: Enroll groups in courses
With groups created and populated, go to each course and add the relevant groups under Enrollment → Add Group. This is the payoff of the group structure: one action enrolls everyone in the group, and future group members inherit access automatically.
This also makes reorganizations manageable. If you're launching a new required compliance training across the whole company, you add the course to every group once rather than enrolling hundreds of individuals.
Step 6: Configure assessments and completion rules
Internal training usually has specific requirements around passing scores, retake limits, and certification. eProfessor lets you configure these per course:
- Pass score: set the minimum percentage to mark a learner as complete
- Attempt limits: decide whether learners can retake a failed quiz and how many times
- Question randomization: shuffle the question pool so retakes aren't predictable
- Certificates: enable automatic certificate issuance on completion, which learners can download or share
For compliance-sensitive training, the combination of a strict pass score, limited retakes, and an automatically issued certificate gives you an auditable completion record without any manual tracking.
Step 7: Apply your branding
Learners logging into a platform that looks like your company's product take the training more seriously than one that looks like a generic LMS. Go to Look & Feel to upload your logo, set your brand colors, and configure a custom domain if you want the portal to live at something like training.yourcompany.com rather than yourcompany.eprofessor.com.
For organizations using eProfessor's white-label option, this step also covers removing any eProfessor branding from the interface entirely.
Step 8: Notify learners
Once enrollment is set up, learners need to know training is waiting for them. eProfessor's announcement tool lets you send emails directly from the platform. Alternatively, export your enrollment list and notify through your company's existing communication channels — Slack, email, your HR system — with a direct link to the portal.
Either way, the message should tell learners what training is required, any deadline, and what happens after they complete it (certificate, manager notification, compliance record update).
Step 9: Monitor progress and run reports
The point of structured internal training is accountability. eProfessor's reporting tools let you track completion by group, by course, or by individual learner. The most useful views for internal training managers:
- Group progress: percentage of a team that has completed a specific course
- Per-learner history: full completion record for a single employee, useful for audits
- Score distribution: how the group performed on assessments, which helps identify whether the training content is landing or needs revision
Reports can be exported if your HR or compliance team needs them in a spreadsheet.
The full picture
For a visual overview of this setup sequence, see our step-by-step internal training setup guide — it maps each step with the specific settings involved and links out to detailed documentation for each one.
The whole process is linear but not locked. You can start with just steps 1 through 5 to get learners into courses quickly, then add assessment configuration and branding in a second pass. Most teams find that the group enrollment model (steps 3 through 5) is where the time investment pays off most — especially once the organization grows past 50 people and managing individual enrollments becomes unworkable.
eProfessor is built for organizations that take training seriously. If you're evaluating whether it fits your internal training needs, start a free trial.
Leave a Reply