
Organizing lessons and modules

Once you've created a course, you'll build out its structure using sections (also called modules) and the lessons inside them. eProfessor gives you two places to do this: the Curriculum tab and the Outline tab. Both work with the same content, but they're suited to slightly different parts of the job.
Getting there
Open any course and use the tab bar to switch between views: Settings, Curriculum, Outline, Students, Assignments, Forms, Certificates. For organizing structure, you'll mainly work in Curriculum and Outline.
Organizing from the Curriculum tab
The Curriculum tab is where you build and edit course structure in detail. On the left, you'll see your Course sections, each one a collapsible group (for example, "Foundations of Coaching") containing the lessons that belong to it. Each lesson in the list shows an icon indicating its primary content type, its title, and a short summary of what's inside it, such as "1 Video 1 Text 1 Assignment 1 Form."
Click the + button next to "Course sections" to add a new section. Click into any lesson to open it on the right side of the screen, where you can rename it, mark a section as Active or hidden with the Hide from course toggle, and edit its content directly.
This tab is the right place to be when you're actively building, since it puts both the structure (left panel) and the content editor (right panel) in view at the same time.
Organizing from the Outline tab
The Outline tab gives you a cleaner, zoomed-out view of your entire course structure, useful when you want to reorder things or get a sense of the full course at a glance without opening each lesson.
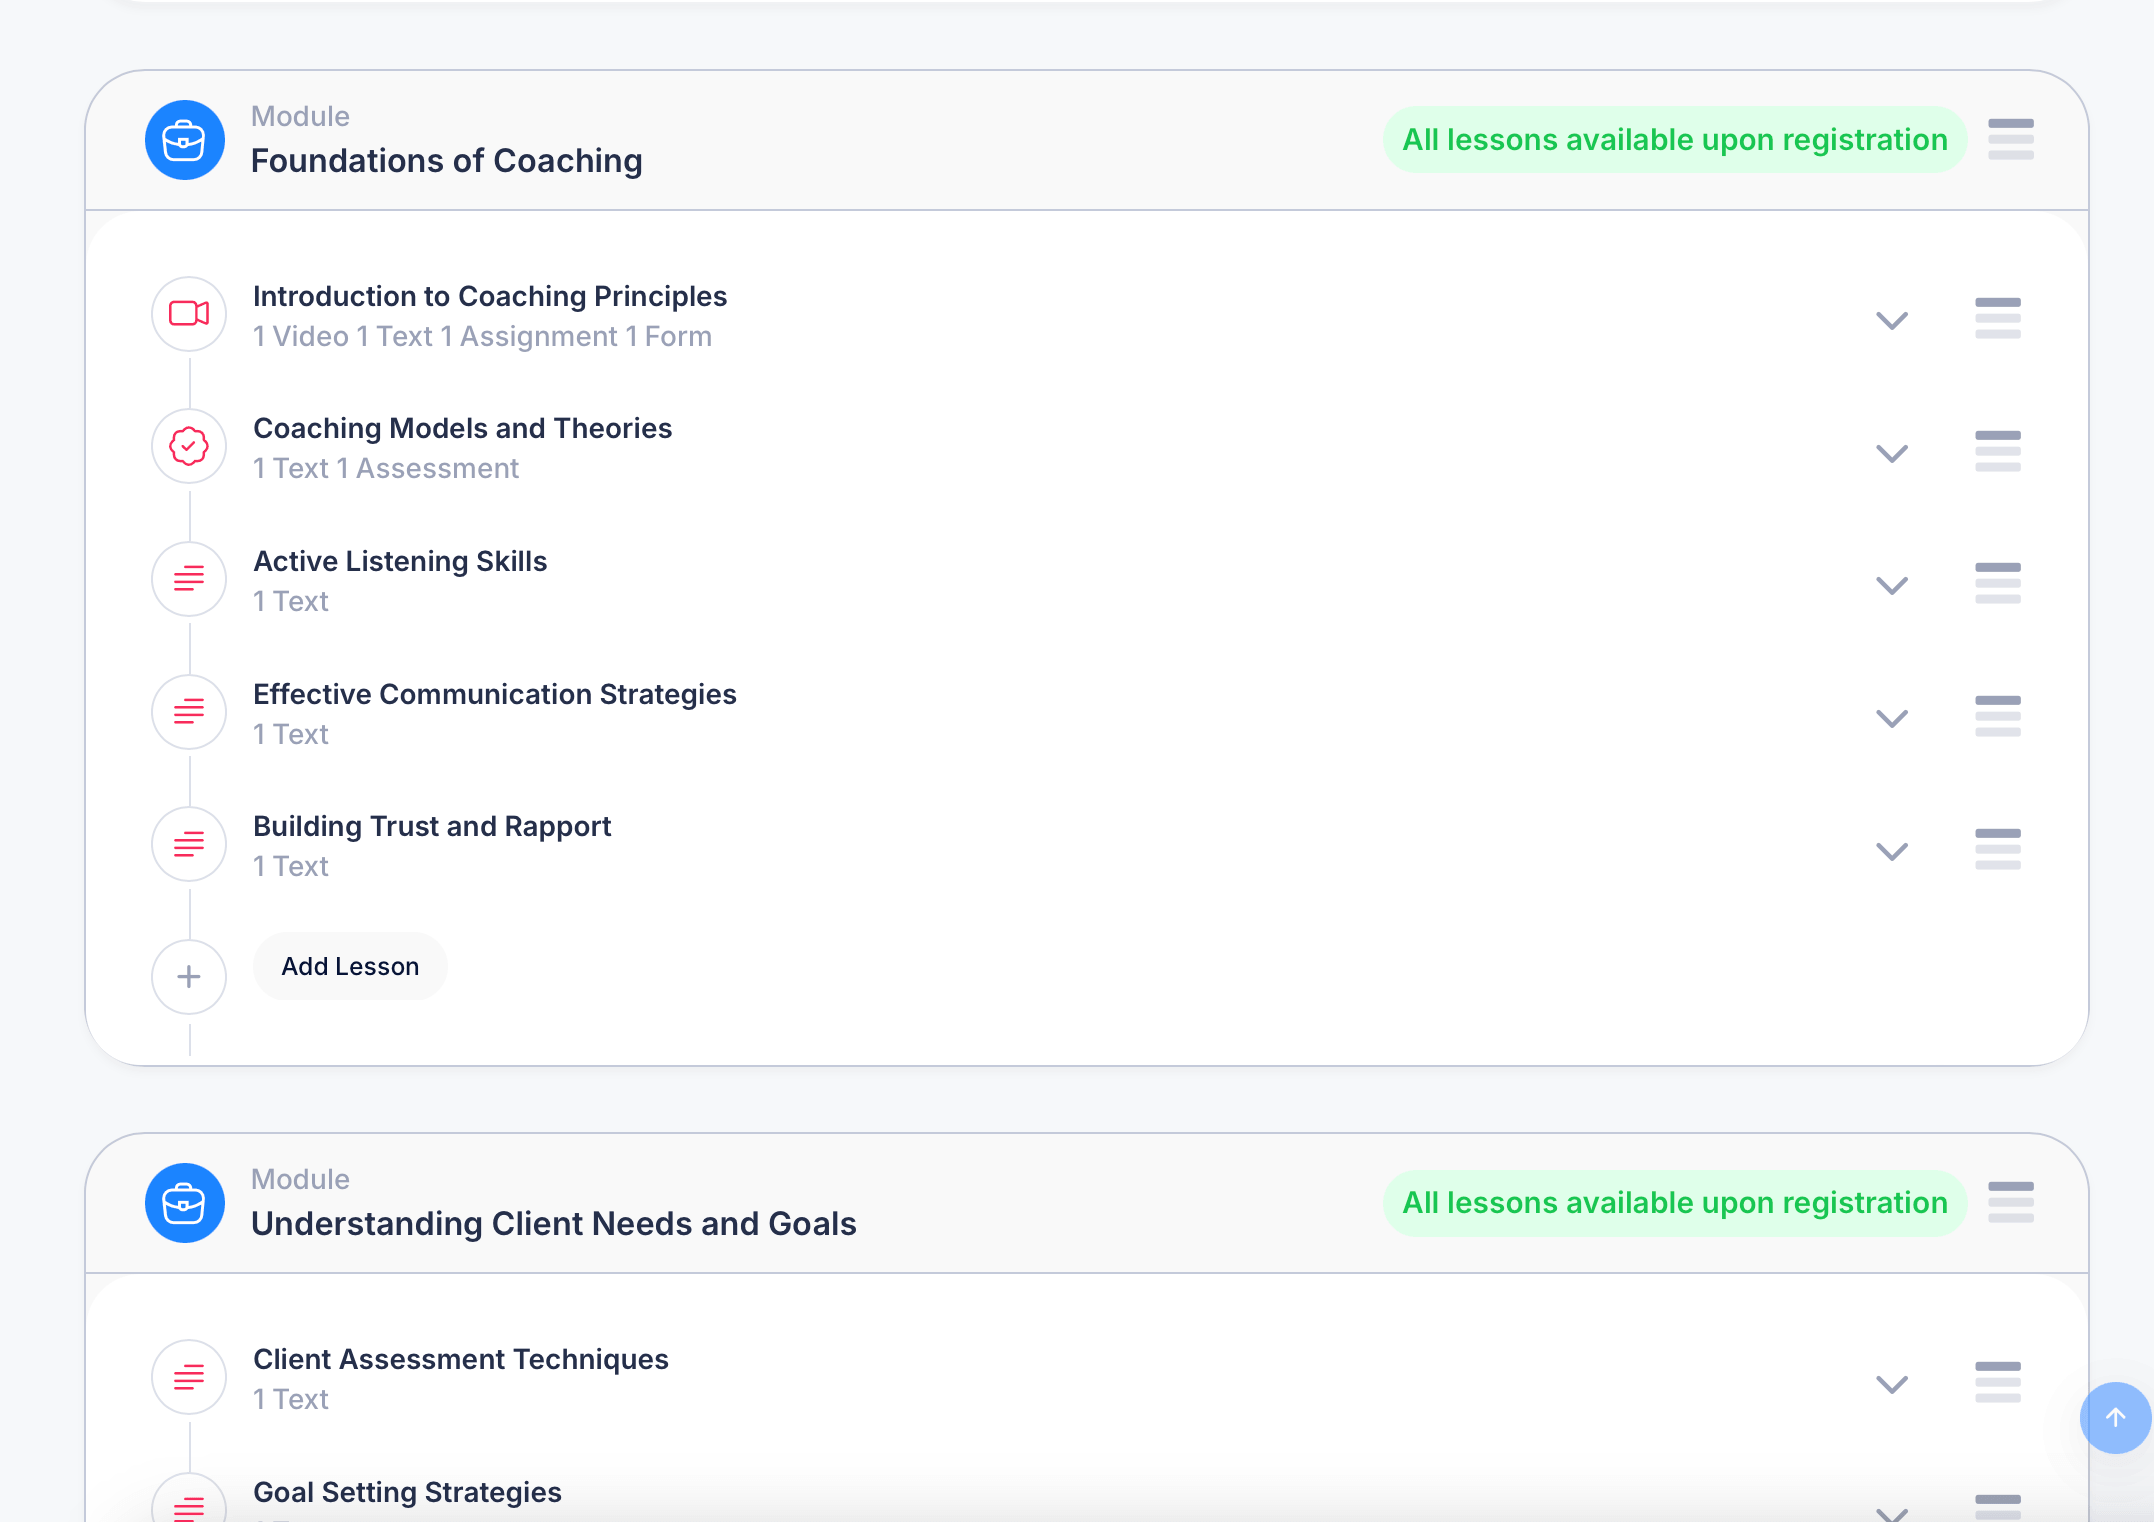
Each module appears as its own block, labeled Module with its title (for example, "Foundations of Coaching"), along with a note indicating how lessons in that module are released, such as "All lessons available upon registration." Inside each module, lessons are listed in order with their content summary, and a drag handle on the right lets you reorder lessons by dragging them up or down within the module.
To add a new lesson to a module, click Add Lesson at the bottom of that module's lesson list. To reorder entire modules relative to each other, use the drag handle next to the module header itself.
Curriculum vs. Outline: which to use when
Use Curriculum when you're adding or editing the actual content inside a lesson, since it gives you direct access to the content editor alongside the structure.
Use Outline when you're reordering lessons or modules, or when you just want a high-level view of how the course is organized without the content editor open.
Controlling when content is released
How students get access to your modules and lessons is controlled separately, under Schedule options for the course. There are four choices:
- All modules and lessons available upon course access — everything unlocks the moment a student enrolls
- Drip each module on schedule — entire modules unlock one at a time on a schedule you set
- Drip each lesson on schedule — individual lessons unlock one at a time, following the order shown in the outline (which you can change by dragging lessons to reorder them)
- Manually set dates — you set specific unlock dates yourself rather than a recurring interval
If you choose either drip option, you'll specify how often new content unlocks, for example "students will be able to access a new lesson every 1 days," with the option to set the interval in days, weeks, or months instead.
A module showing the note "All lessons available upon registration" in the Outline tab is simply reflecting whichever schedule option is currently set for that course.
Tips
Lesson icons in both views hint at what's inside before you even open them. A video camera icon means the lesson leads with video content, a checkmark badge means it includes an assessment, and lines-of-text icons mean it's primarily text-based.