
Creating and Managing a Product

Digital Downloads, found under Content, lets you sell files and resources that students download after purchase, separate from courses and assessments. Think ebooks, templates, presets, software, or any standalone file-based product.
The Digital Downloads list
Go to Content > Digital Downloads to see every download product you've created. Each card shows its cover image, title, Price, and Status (Active or otherwise), with Actions to manage it. Use Search downloads, the Status filter, and the Table / Cards toggle the same way you would on the Courses listing.
Click New Download to create a new product. Each one you create gets its own set of five tabs: Settings, Files, Pricing, Landing page, and Customers.
Settings tab
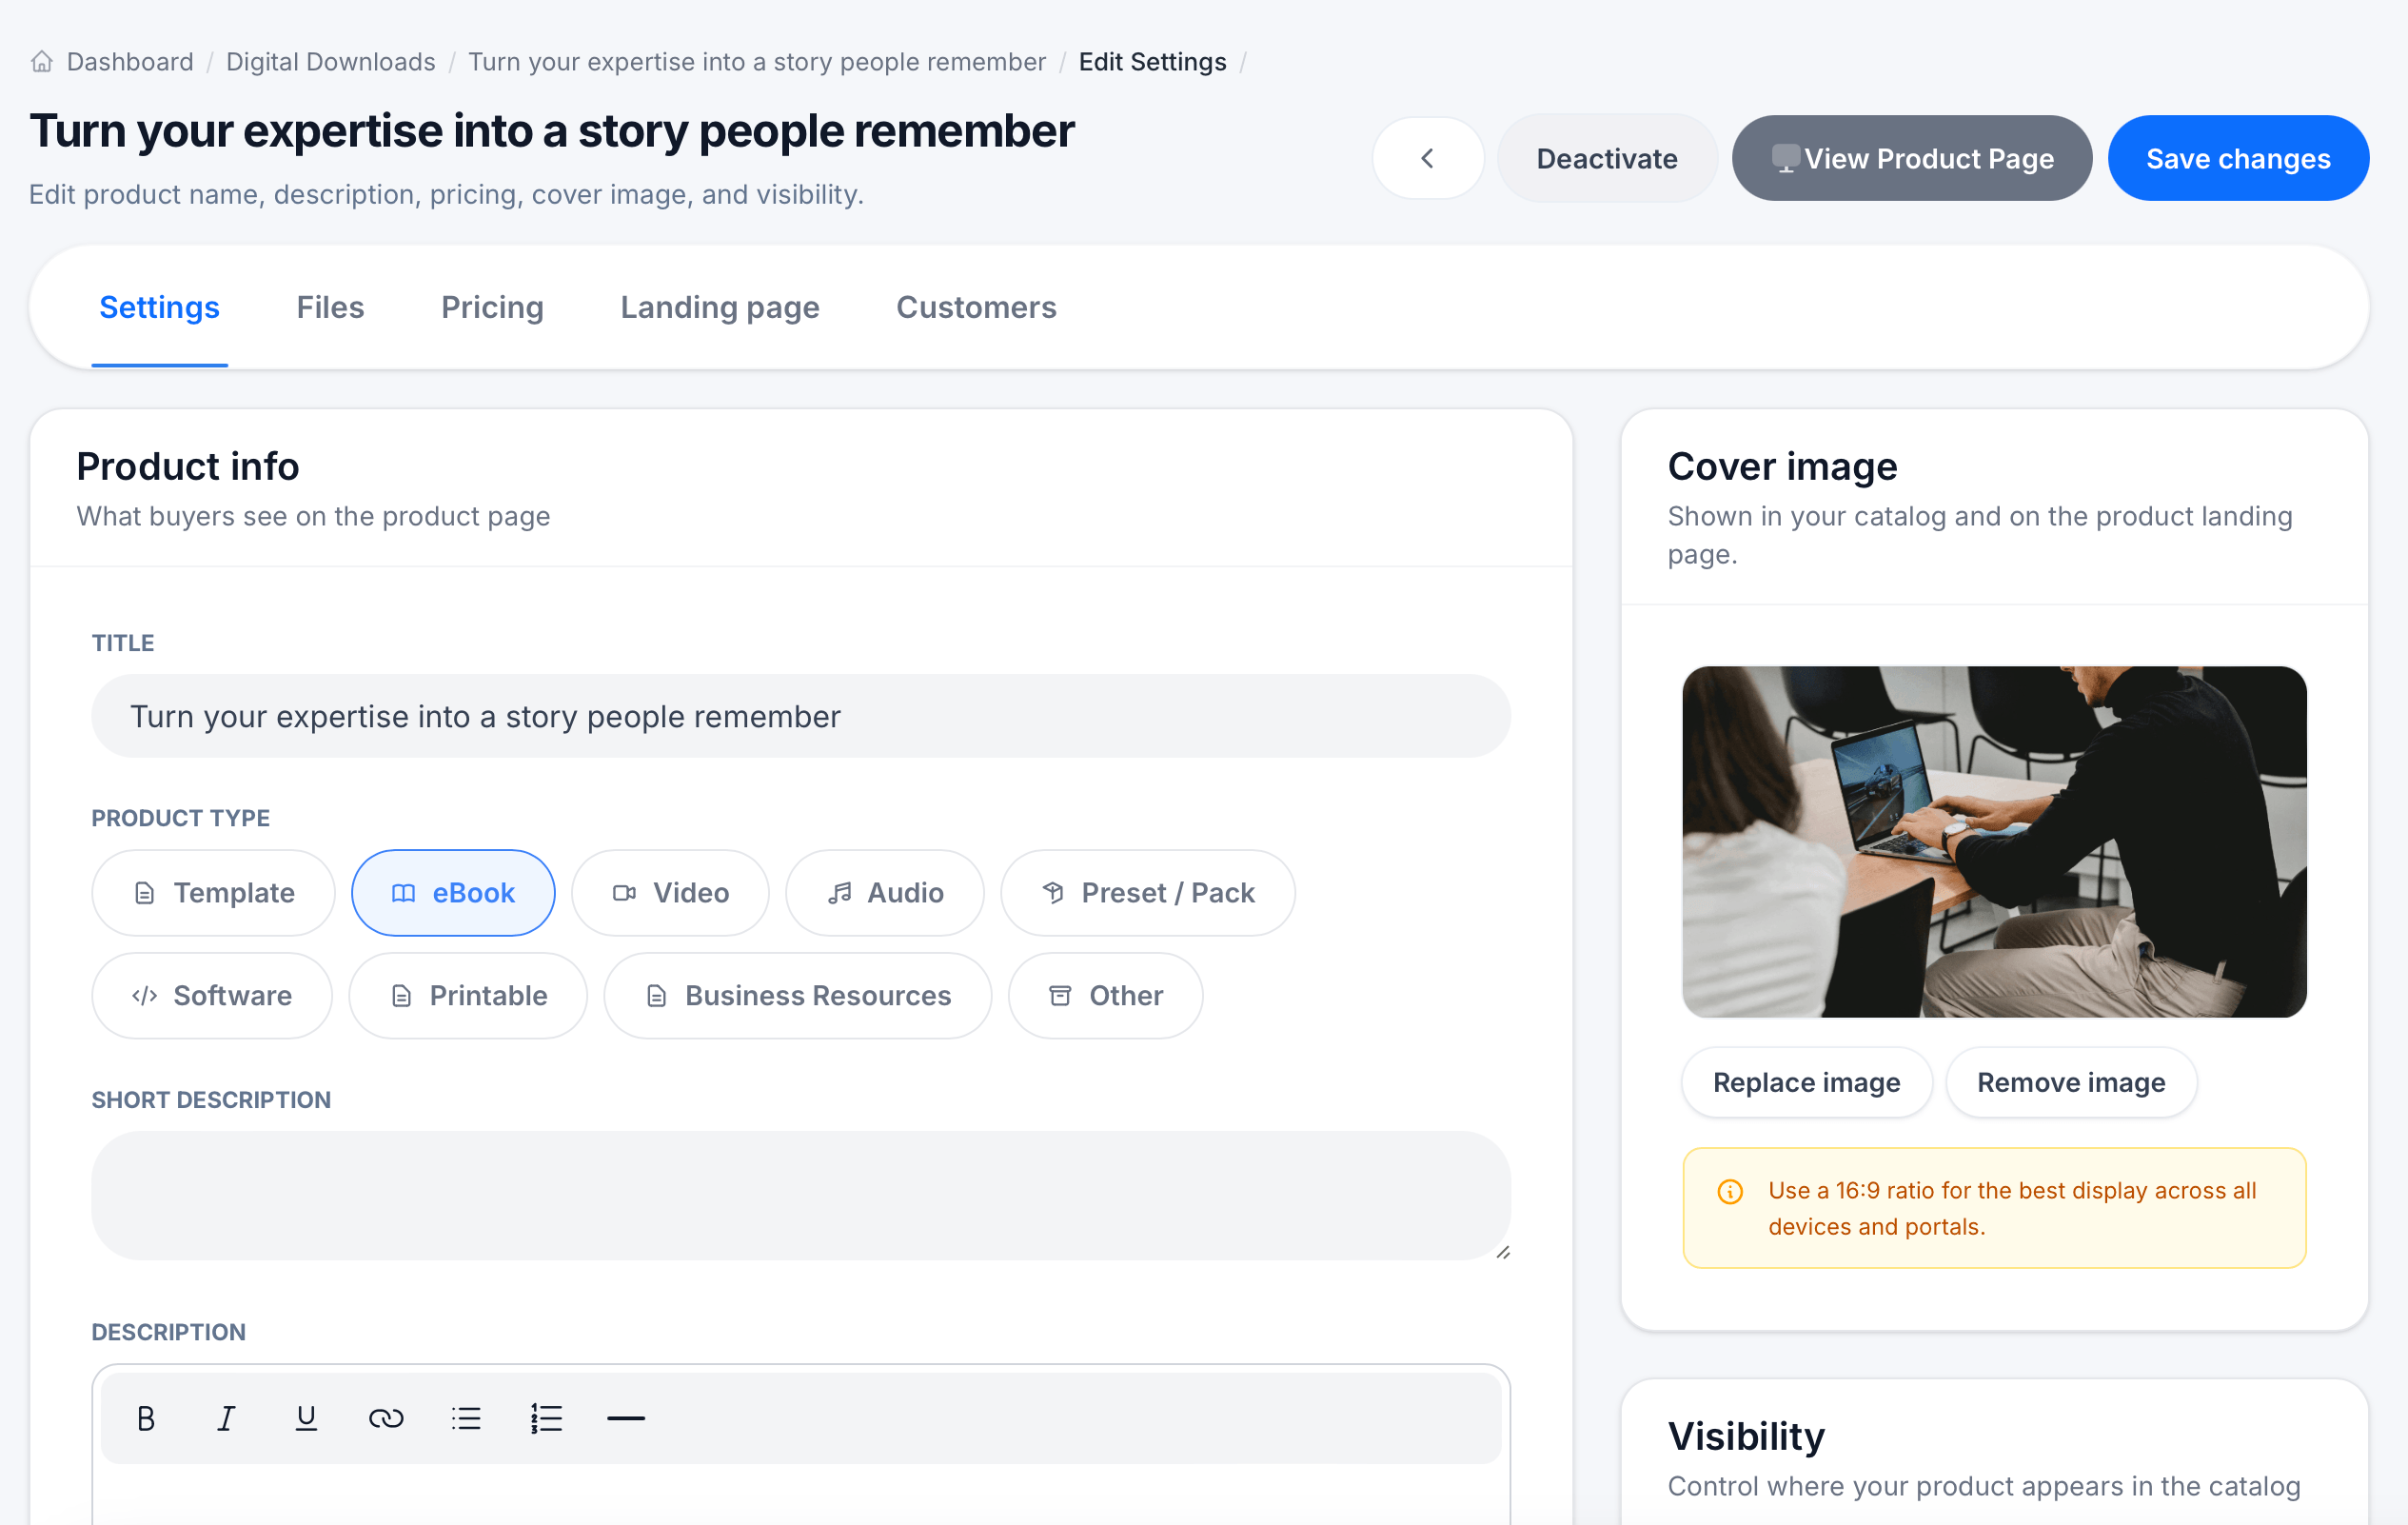
The Settings tab covers everything buyers see on the product page, plus visibility and lifecycle controls.
Product info includes:
- Title — the product's name
- Product type — choose the category that best describes it: Template, eBook, Video, Audio, Preset/Pack, Software, Printable, Business Resources, or Other
- Short description — a brief summary
- Description — a full rich-text description with formatting options (bold, italic, underline, links, lists, dividers)
- Tags — comma-separated keywords that help buyers find your product in search or browsing
Cover image is shown in your catalog and on the product landing page. Use a 16:9 ratio for the best display across devices and portals. Replace image or Remove image to manage it.
Visibility has a single toggle, Show in public catalog, controlling whether the product appears for anyone browsing your storefront or is only accessible via direct link.
At the bottom, two lifecycle actions are available:
Deactivate product hides the product from your store; current buyers will no longer be able to download it. This is reversible.
Delete product permanently removes the product. This cannot be undone, so use Deactivate instead if there's any chance you'll want it back.
Click Save changes in the top right after making edits.
Files tab
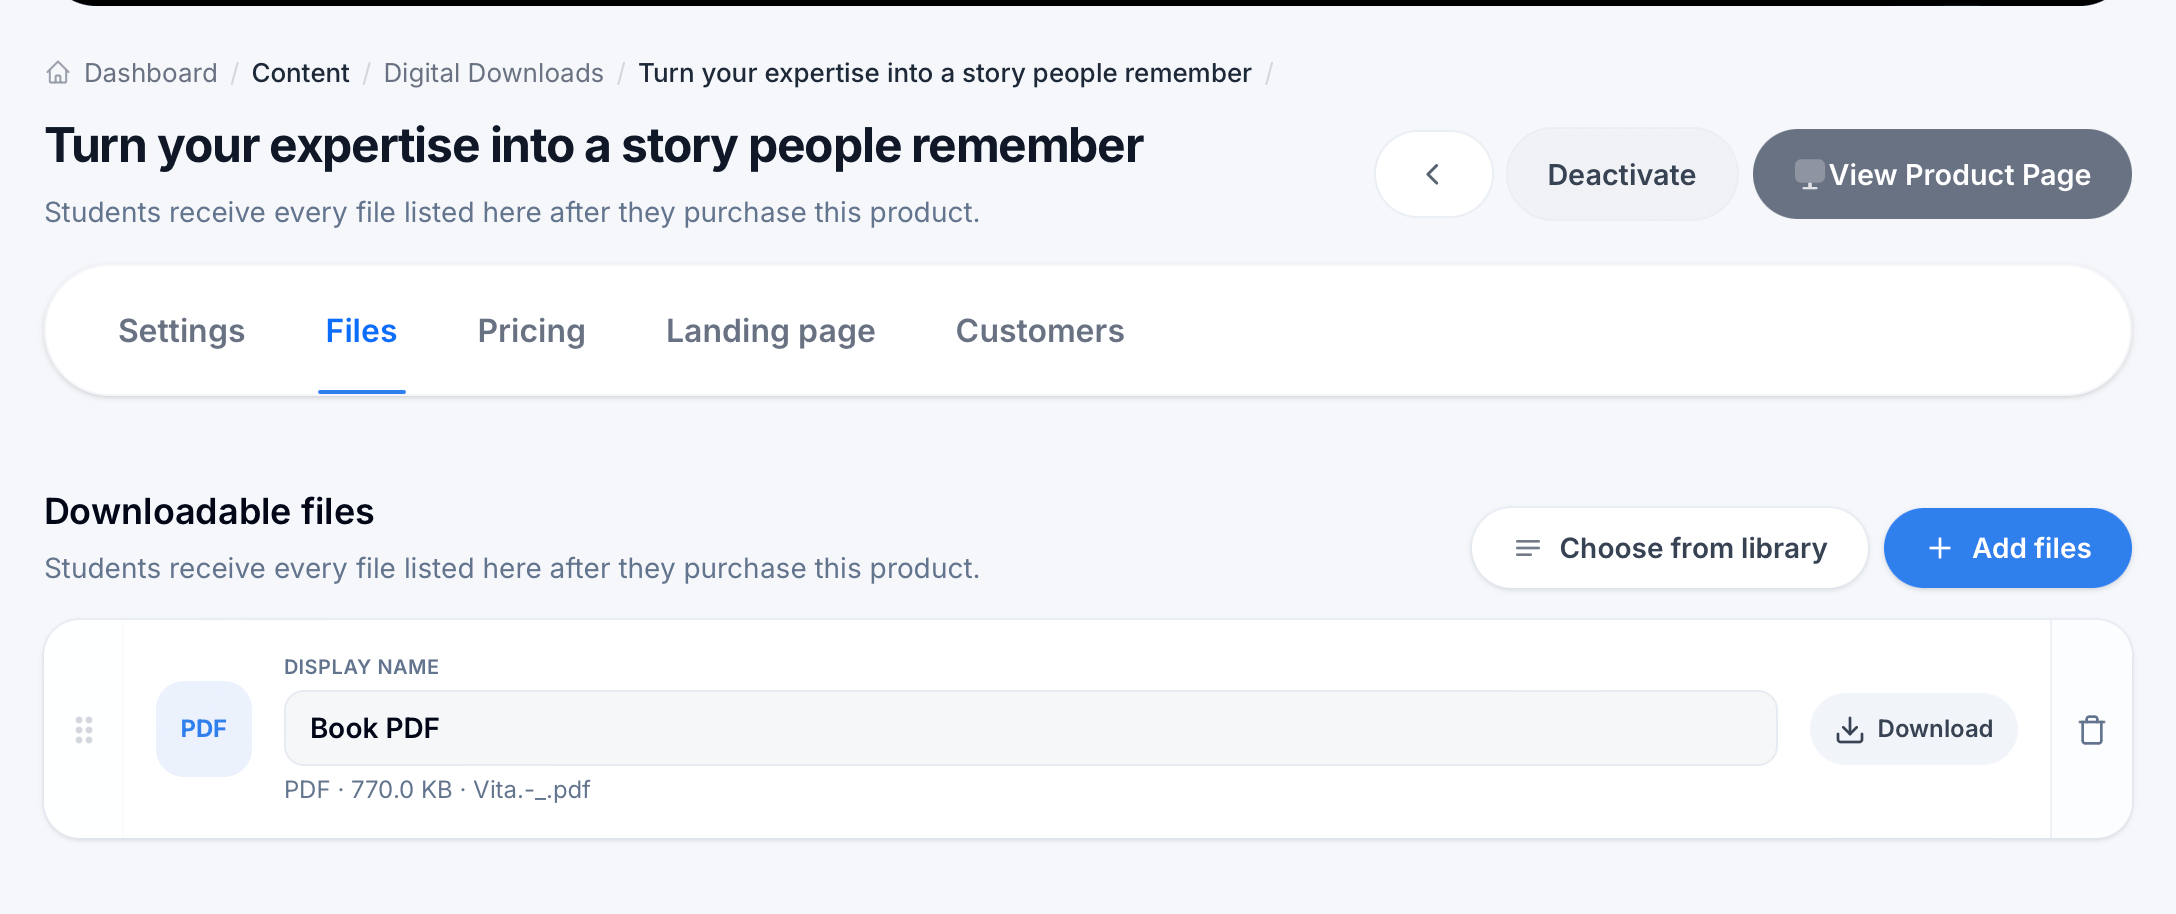
The Files tab is where you attach the actual downloadable content. A reminder at the top makes the behavior clear: students receive every file listed here after they purchase this product.
Click Add files to upload new files directly, or Choose from library to reuse a file you've already uploaded elsewhere rather than uploading it again.
Each file in the list shows its type icon (such as PDF), a Display name field you can edit (what buyers will see, separate from the underlying filename), the file's technical details (format, size, and original filename), a Download button to preview the file yourself, and a trash icon to remove it. A drag handle on the left lets you reorder multiple files.
Tips
Choosing the right Product type matters for how the product is categorized and displayed; pick the closest match even if your product doesn't fit perfectly into one category.
If you're testing a new download before launch, leave Show in public catalog off so only people you share a direct link with can see it, then turn it on once you're ready for it to appear in your storefront.
A product can hold multiple files. Use this when a single purchase should unlock a bundle, for example an ebook plus a companion worksheet, rather than creating separate products for each file.