
Reviewing Form Responses
The Forms tab on a course gives you a central place to see every form used across your lessons, along with aggregated response data and individual submissions for each one.
Getting there
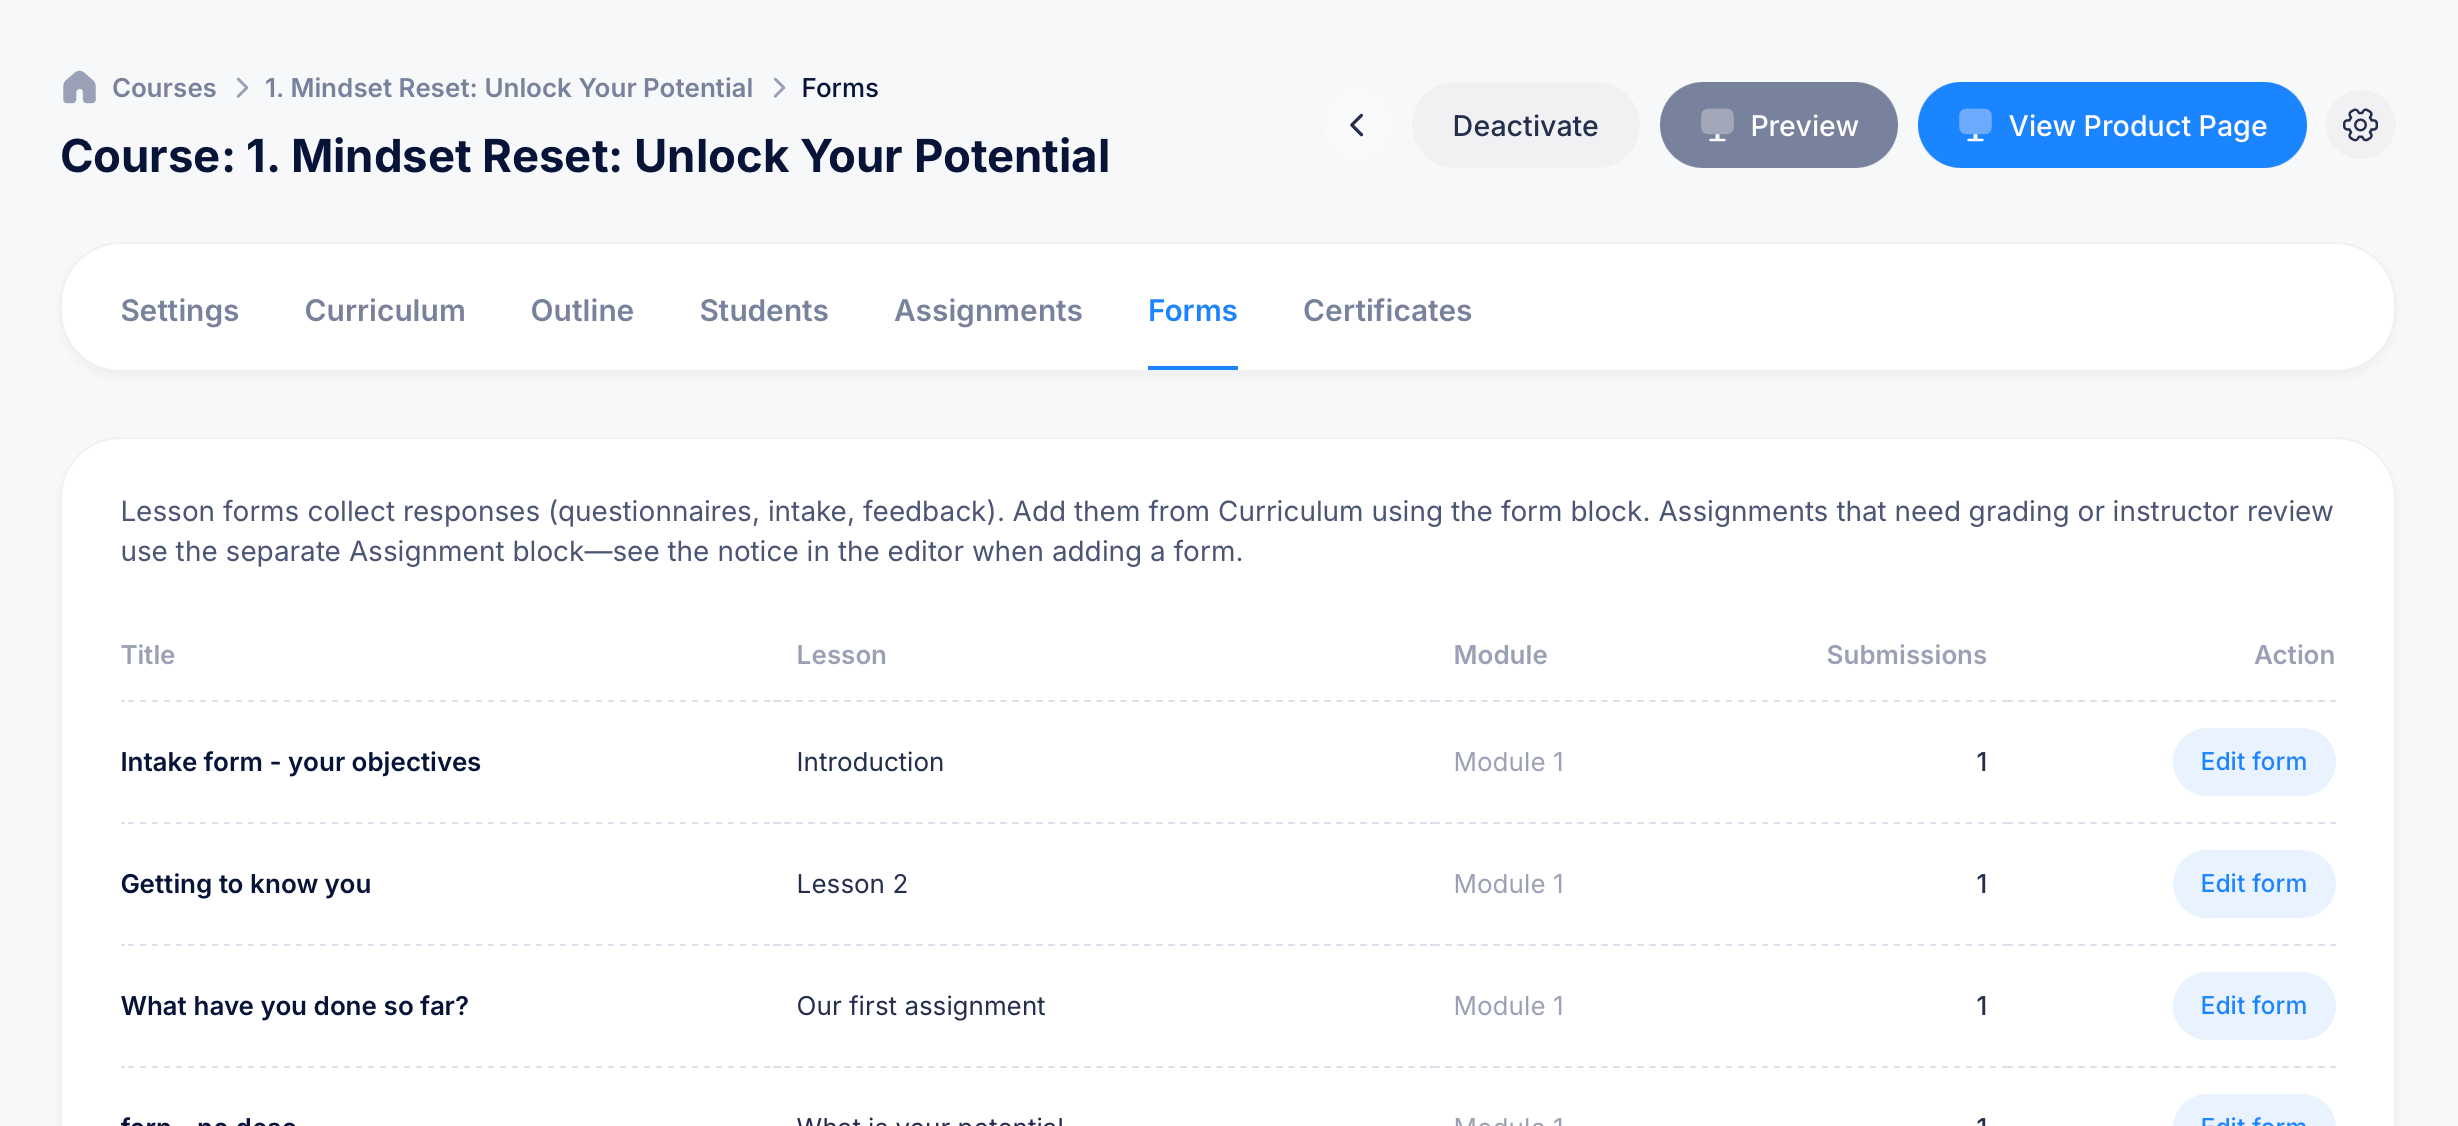
Open a course and select Forms from the tab bar. A short note at the top reminds you how forms fit into the bigger picture: lesson forms collect responses like questionnaires, intake surveys, or feedback, and get added from the Curriculum tab using the Form block. If what you actually need is something that requires grading or instructor review, that's a job for the Assignment block instead, not a form.
The forms list
Every form used anywhere in the course appears in a single table, regardless of which lesson or module it lives in. Each row shows:
- Title — the name of the form
- Lesson — which lesson it's attached to (for example, "Introduction" or "Lesson 2")
- Module — which module that lesson belongs to
- Submissions — how many responses have been collected so far
- Action — click Edit form to jump straight into editing that form's questions
This table is a fast way to see every form in your course in one place, rather than hunting through Curriculum lesson by lesson to find where each one lives.
Viewing aggregated data for a form

Click into a form to see its results dashboard. At the top, three summary cards show Total responses, Questions in form, and the Latest response date. Click Edit form here if you need to make changes to the form itself.
Two tabs let you switch how you view the data:
Aggregated data — the default view, showing each question with a breakdown of how everyone answered. Text questions show individual responses listed out (for example, "hh" and "I am a certified life coach" for a background question with 2 responses). Multiple choice and checkbox questions show each option with a percentage and count, plus a visual bar showing relative popularity (for example, "Methodology 1: 50.00% (1)").
Responses — switches to a list of individual submissions instead of the aggregated view, letting you review one student's full set of answers at a time.
A Recent responses panel on the side lists the most recent submitters by name and submission date, with View all responses to see the complete list.
Reviewing an individual response
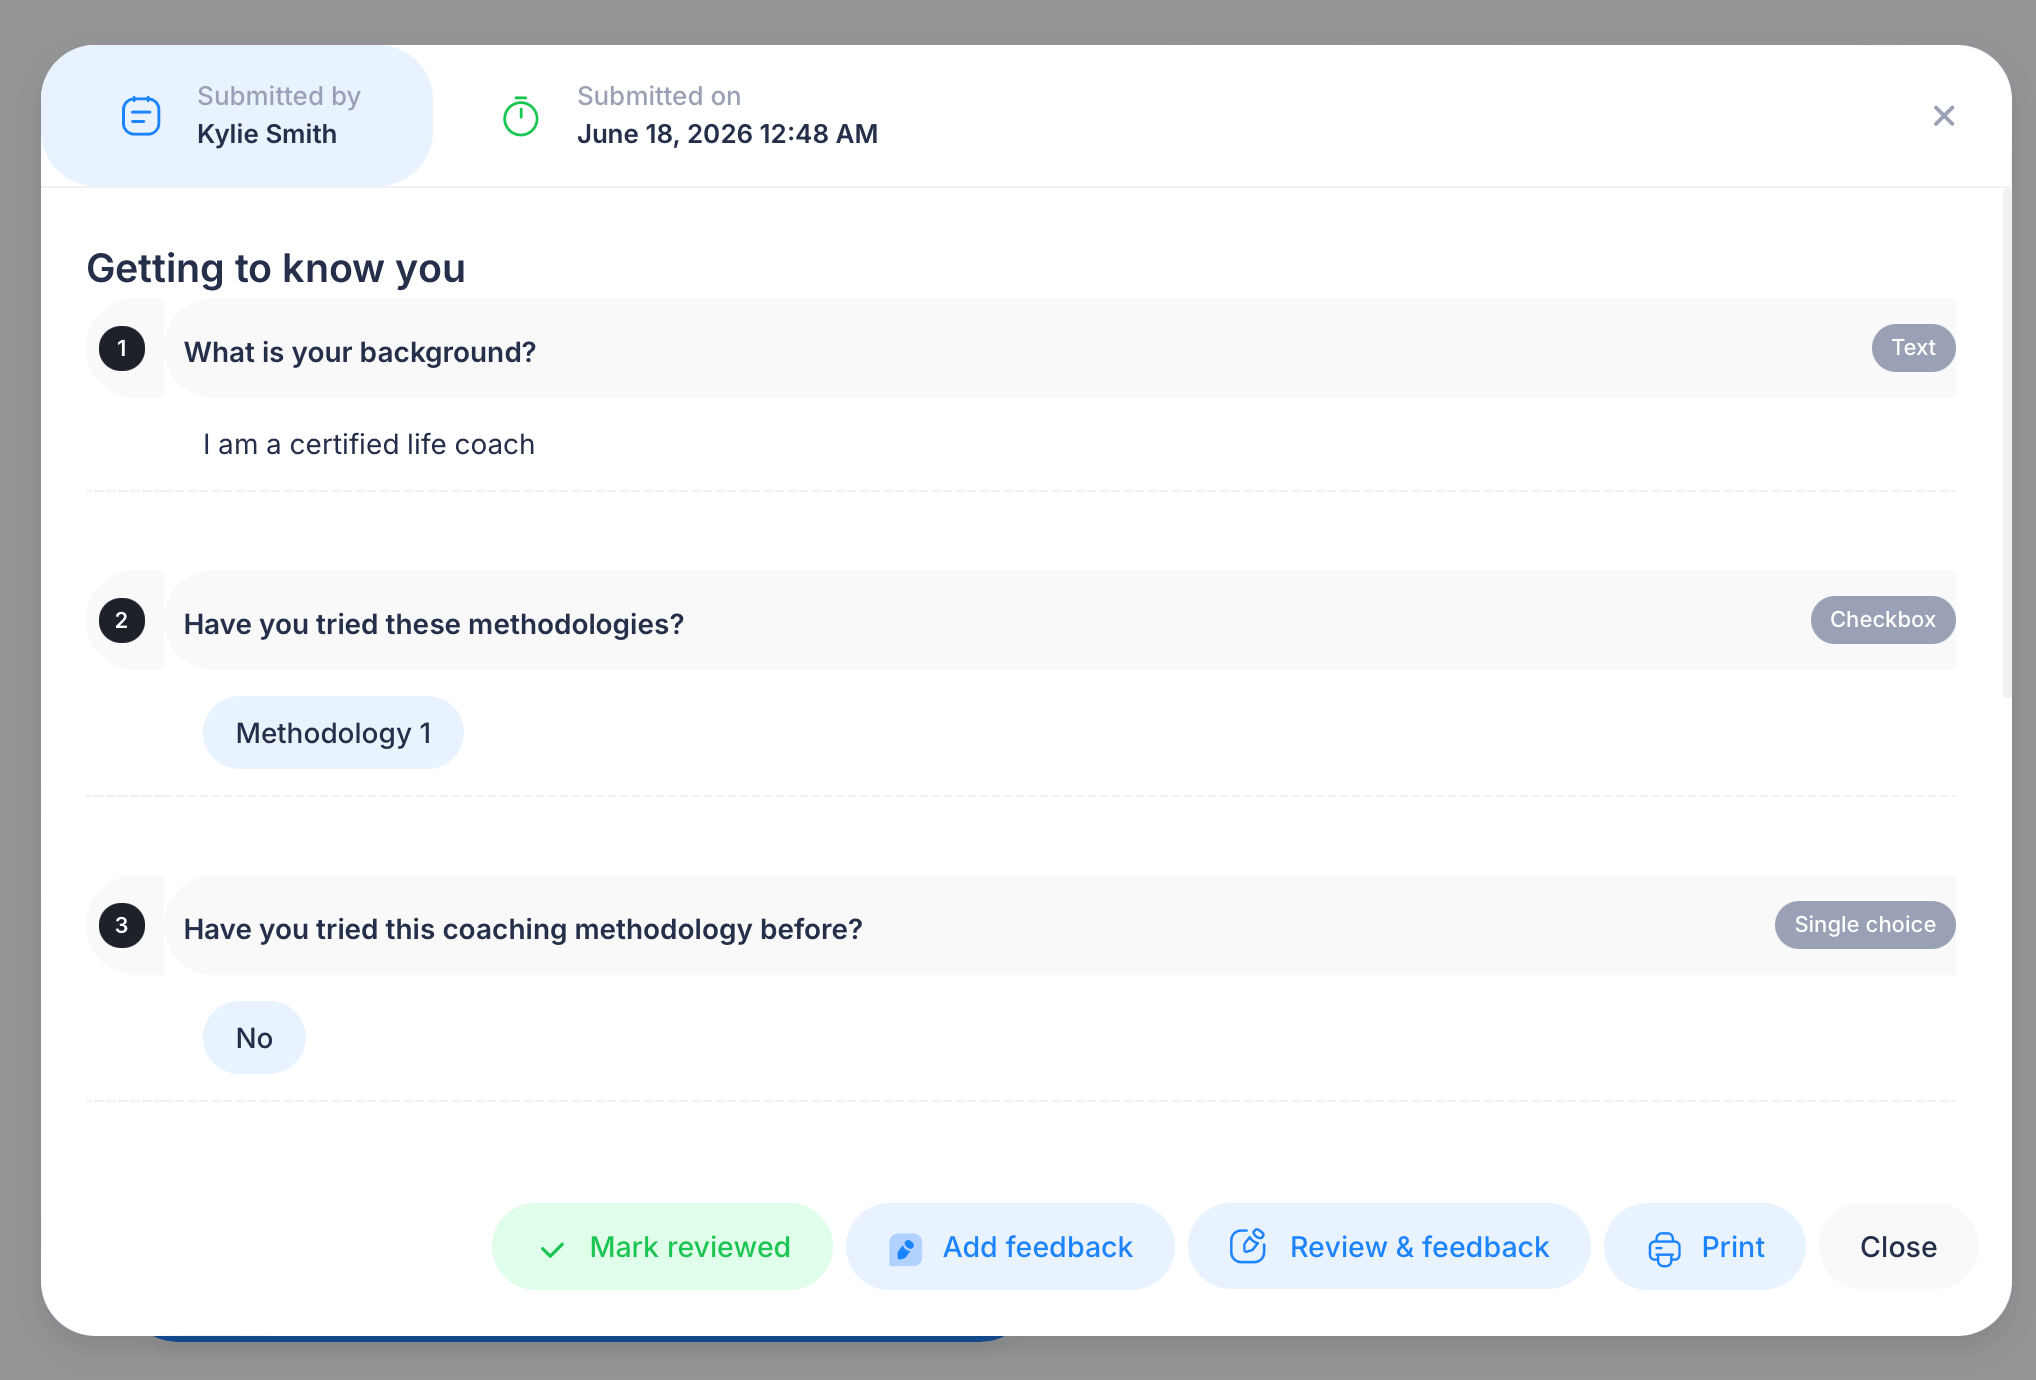
Opening a specific response shows who submitted it and when, followed by every question in the form along with that student's actual answer. Each question is labeled with its type (Text, Checkbox, Single choice, and so on), and the student's response appears directly underneath.
At the bottom, a few actions are available:
Mark reviewed — flags this response as reviewed, with no feedback attached.
Add feedback — leave an overall note on the response without marking it as reviewed.
Review & feedback — opens the response in detail so you can add feedback on individual questions one by one, rather than a single overall note.
Print — generate a printable or PDF copy of the response.
Close — return to the form's response list.
Tips
Forms and Assignments serve different purposes even though both can appear inside a lesson. Use a Form when you're collecting information, like a survey, intake questionnaire, or feedback, that doesn't need a pass/fail judgment. Use an Assignment instead when a student's submission genuinely needs to be checked, approved, or graded.
The Aggregated data view is the fastest way to spot patterns across an entire class, like which methodology most students have already tried, while the Responses view is better when you need to look closely at one specific student's answers.