
Reviewing Assignment Submissions
The Assignments tab on a course is where you review every homework submission students have sent in, organized by lesson, with tools to approve or reject individual items and communicate directly with students about their work.
Getting there
Open a course and select Assignments from the tab bar.
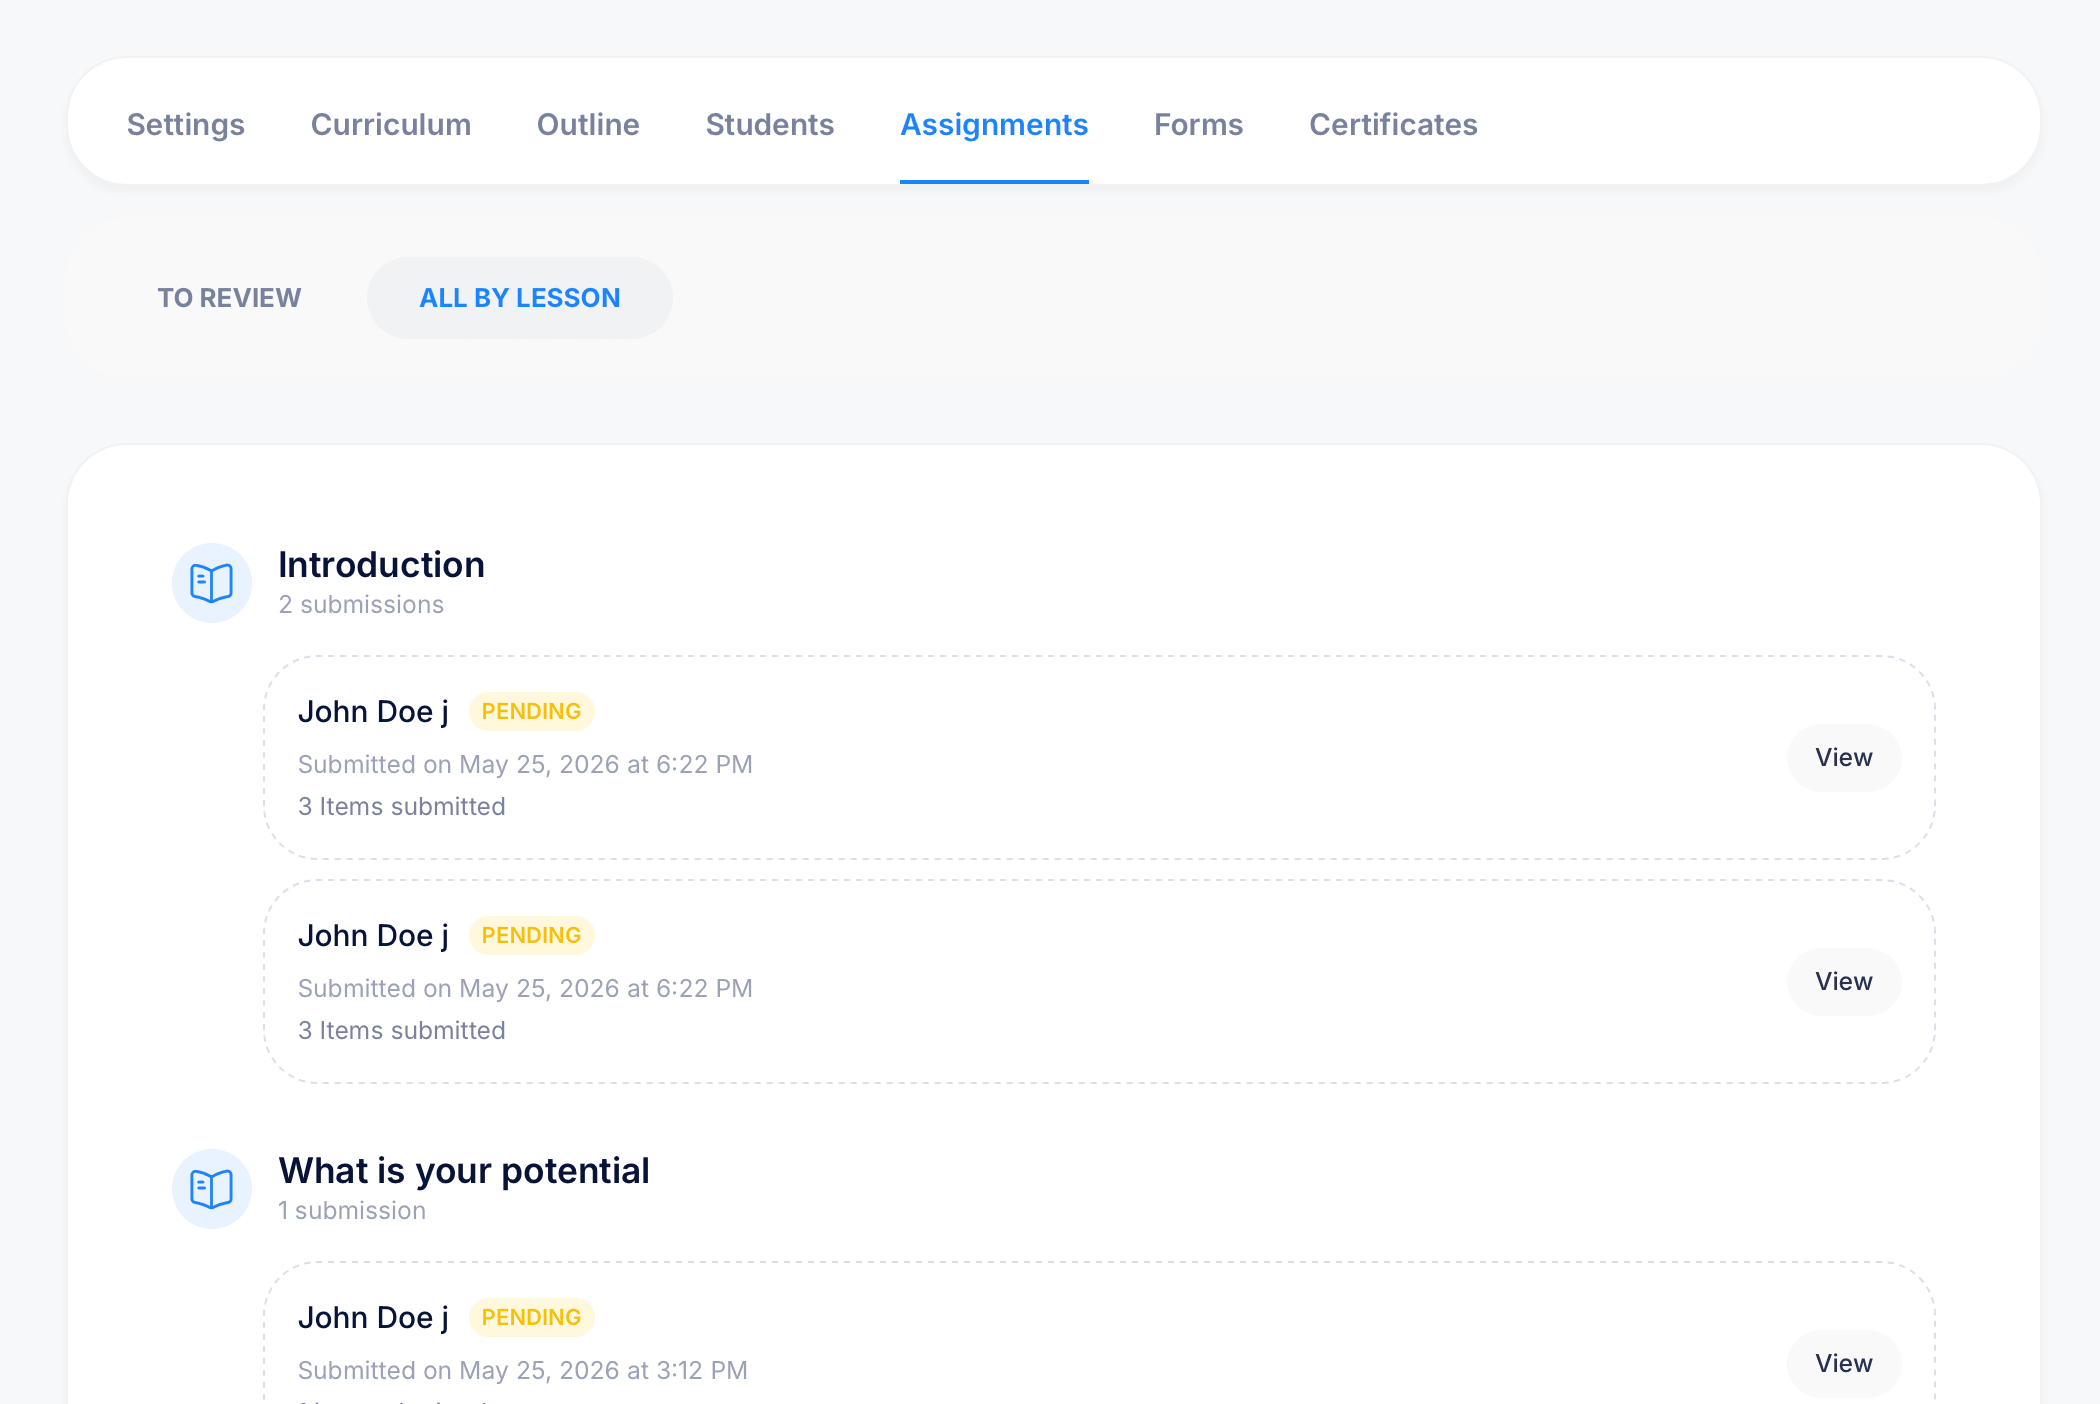
Two ways to view submissions
At the top of the tab, switch between two views:
To Review — shows only submissions that still need your attention.
All By Lesson — shows every submission, organized under the lesson it belongs to, regardless of review status. Each lesson heading shows how many submissions it has received in total (for example, "2 submissions").
Under All By Lesson, each submission entry shows the student's name, a status badge such as Pending, the date and time it was submitted, and how many items were included (for example, "3 Items submitted"). Click View to open the full submission.
Reviewing an individual submission
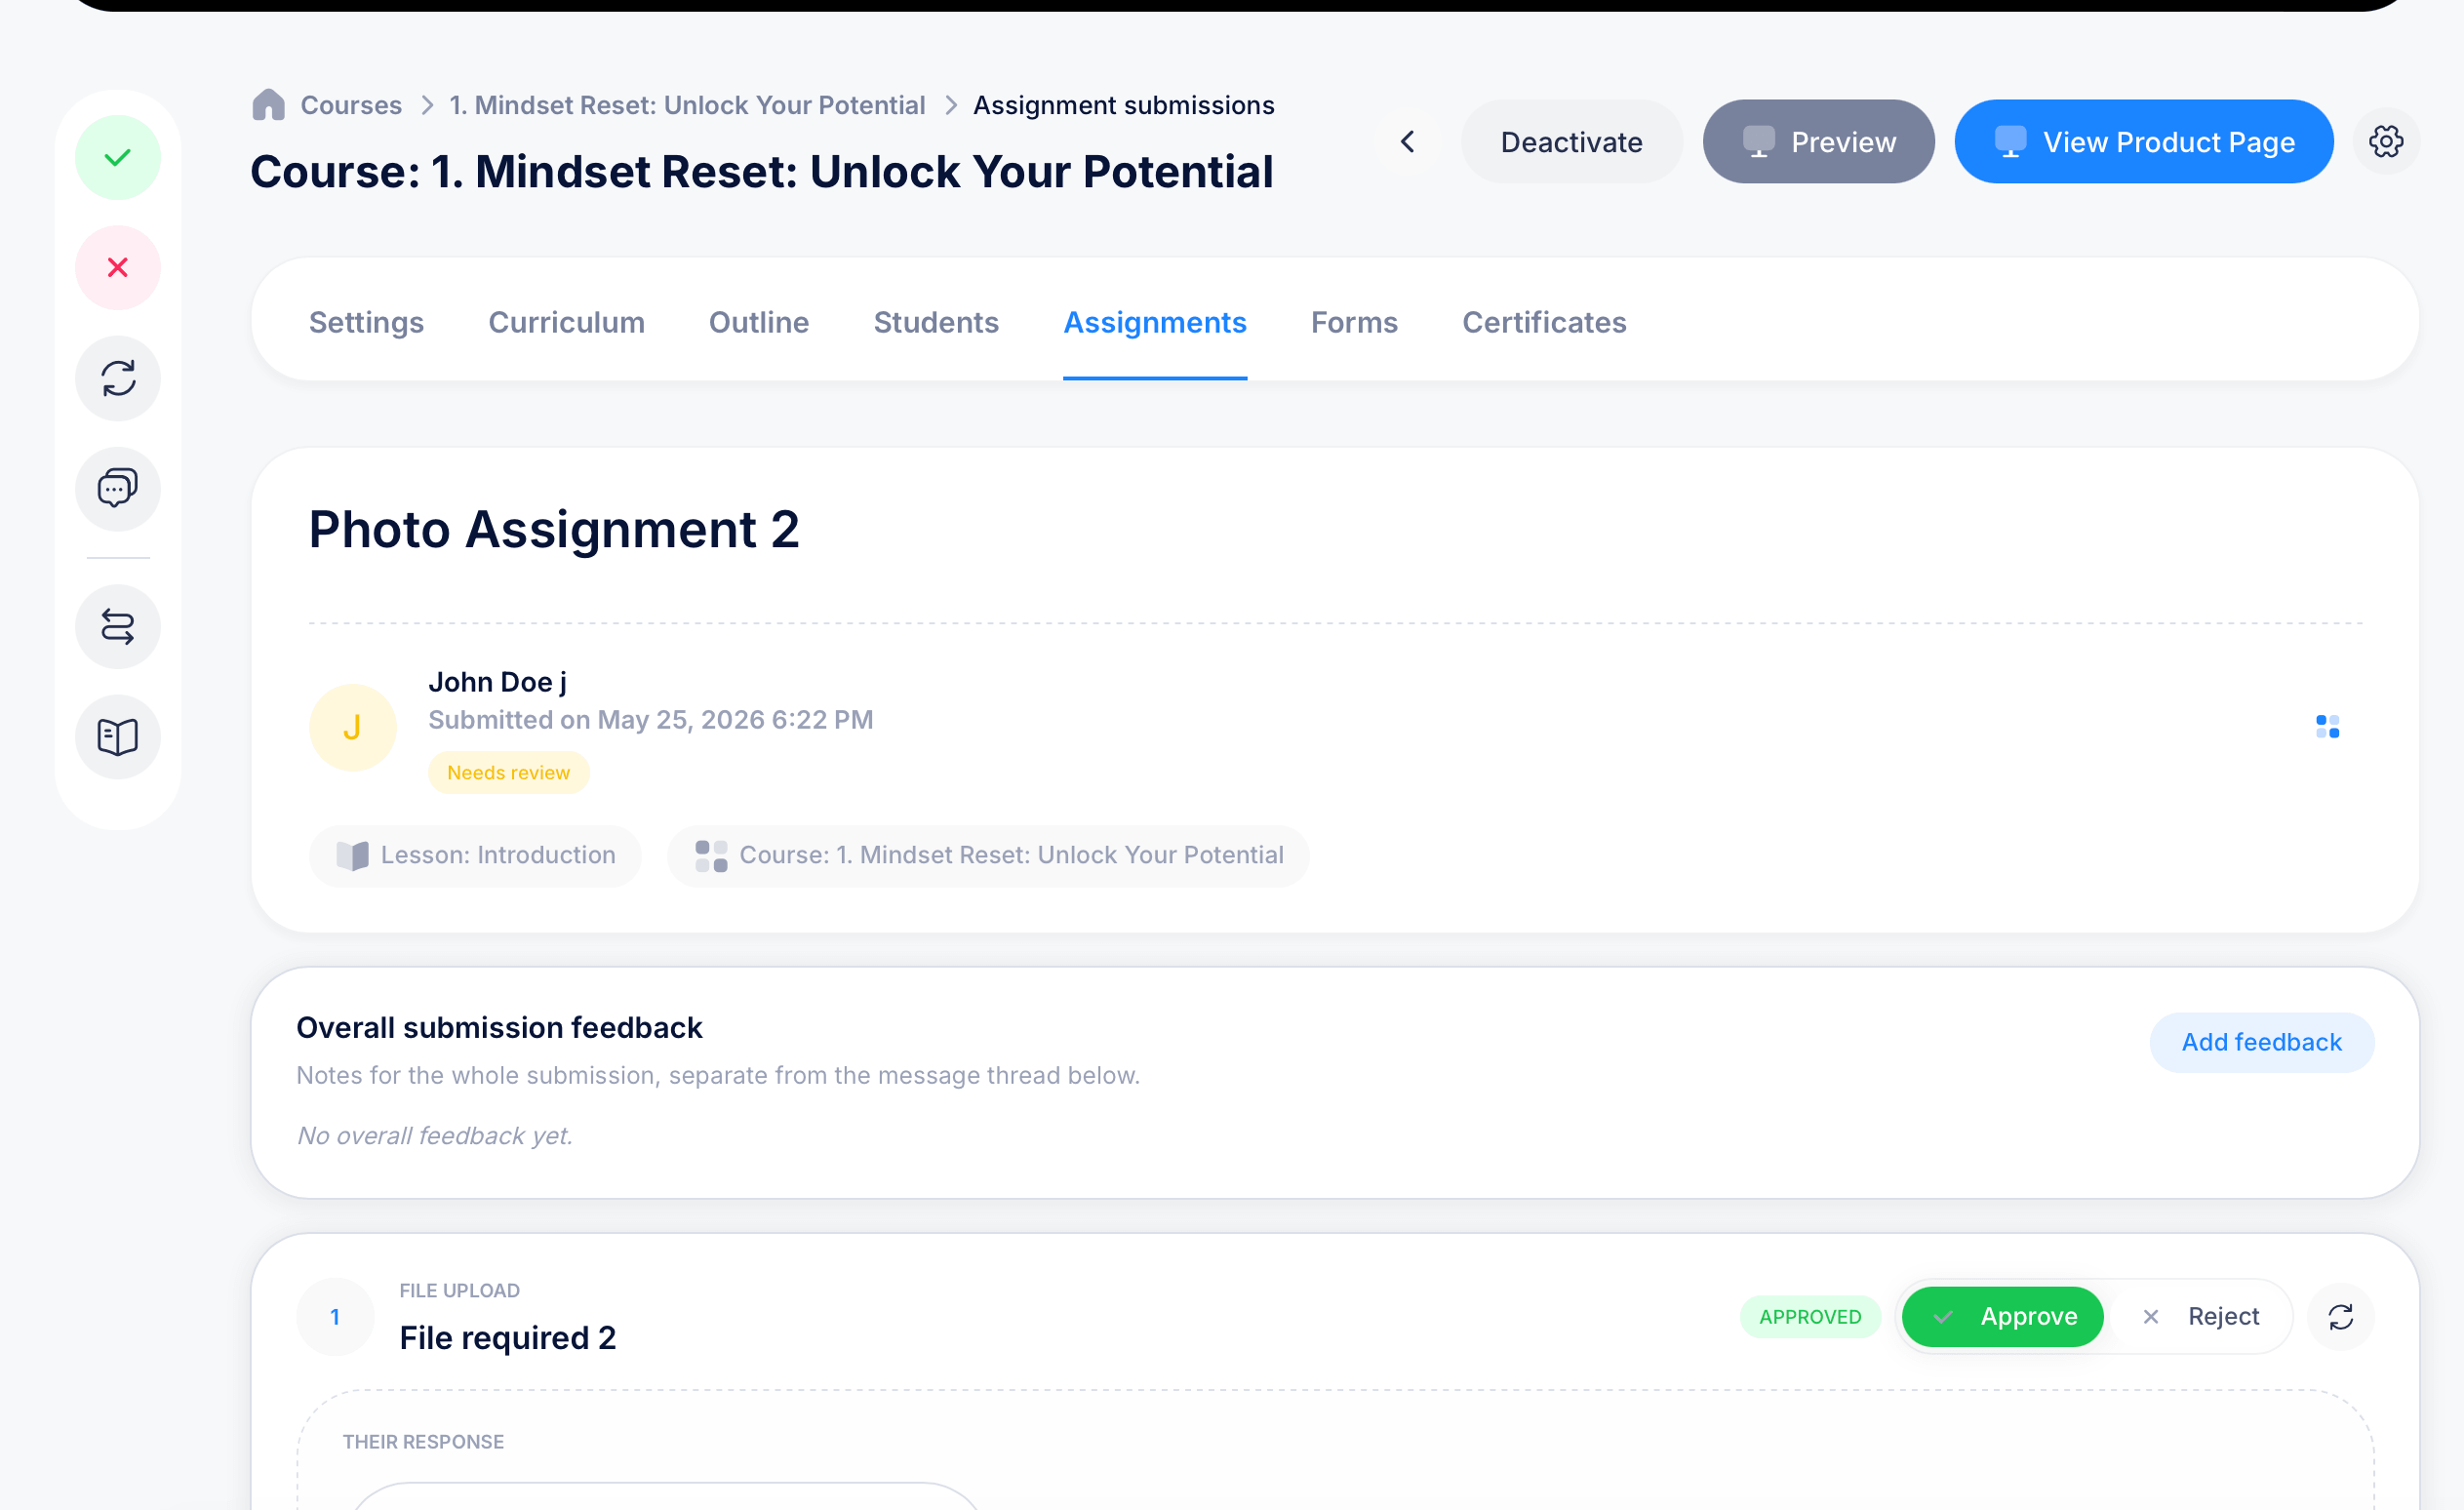
Opening a submission shows you the assignment name, the student who submitted it, when they submitted it, and a status badge like Needs review. Below that, you'll see which Lesson and Course this submission belongs to, useful context if you manage many courses or lessons at once.
An Overall submission feedback section lets you leave a note covering the entire submission, separate from any per-item conversation. Click Add feedback to write one if none exists yet.
Each individual item the student submitted appears below, labeled with its type (such as FILE UPLOAD) and the title you gave it when building the assignment (for example, "File required 2"). The student's actual response appears under THEIR RESPONSE. Each item has its own Approve or Reject controls, along with a status badge (APPROVED, for example) once you've made a decision, so you can review and decide on each requested item independently rather than only approving or rejecting the submission as a whole.
The floating action sidebar
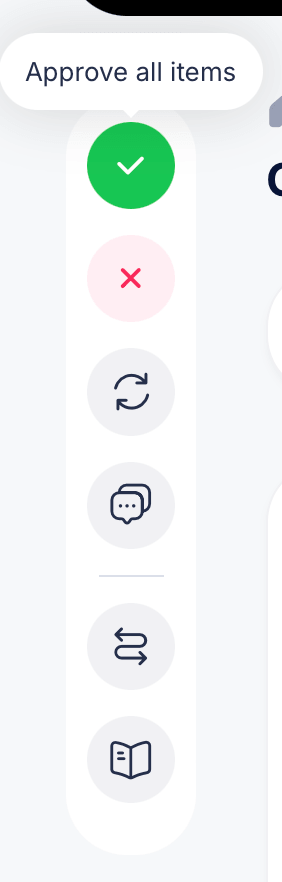
While reviewing a submission, a vertical sidebar of icons sits on the left for quick actions:
- Green checkmark — Approve all items in the submission at once
- Red X — Reject all items in the submission at once
- Refresh icon — reset items back to a pending state
- Message bubble — Send message to student, letting you communicate with them directly about their submission
- Swap arrows — View student course progress, jumping to the same detailed progress view available from the Students tab
- Book icon — jump to the lesson this assignment belongs to
Use the all-at-once Approve or Reject icons when every item in a submission deserves the same outcome, and fall back to reviewing items individually when some parts of a submission are fine while others need more work or a rejection.
Tips
Use All By Lesson when you want a full picture of submission volume across your course, and switch to To Reviewwhen you just want a working queue of what's left to grade, similar to how Pending Submission Reviews works from the Dashboard but scoped to this specific course.
If a student's work is mostly good but one item is missing or wrong, reject just that item rather than the whole submission. This lets the student know exactly what to fix without having to resubmit everything else they already got right.
The Send message to student option is useful when a rejection alone doesn't explain what you need, pairing direct feedback with your approve/reject decision gives students a clearer path to correcting their work.