
Adding students (manual, self-enrollment, bulk import)
The Students section, found under Users, is your account-wide list of everyone who has or has had student access to your portal. From here you can add students one at a time, import a large group via CSV, and manage individual student accounts.
Getting there
Go to Users in the top navigation and select Students.
The student list
Every student on your account appears in a table showing their Name, Email, Status (Active or Inactive), and an Actionsdropdown. Some email addresses show a small information icon, indicating the student hasn't yet verified their email address.
Use Search Student to find someone by name, or the Status filter to narrow the list to active or inactive students only. Checkboxes next to each row let you select multiple students at once for bulk actions.
Adding a student manually
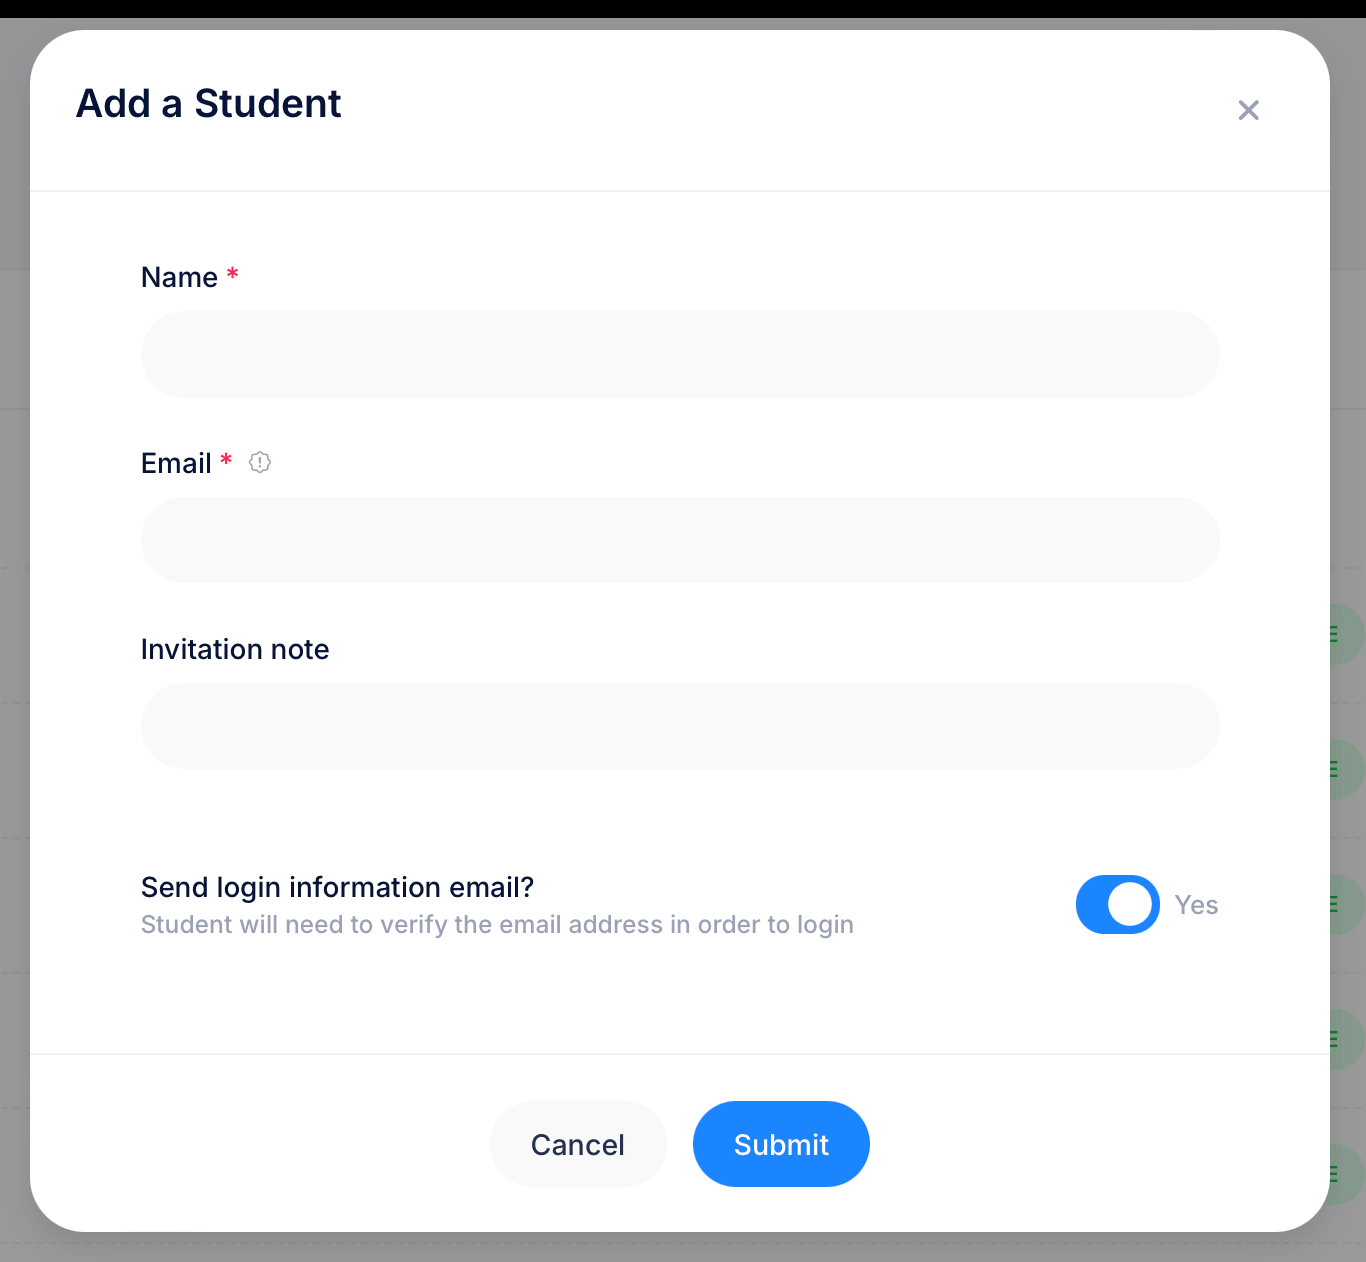
Click New Student to open the Add a Student form. Fill in the student's Name (required) and Email (required). Two additional options appear below:
Invitation note — an optional message included in the welcome email sent to the student. Use this to give them context about what they've been added to and what to do next.
Send login information email? — when toggled on (the default), the student receives an email with their login details and will need to verify their email address before they can log in. Click Submit to create the account.
Importing students in bulk
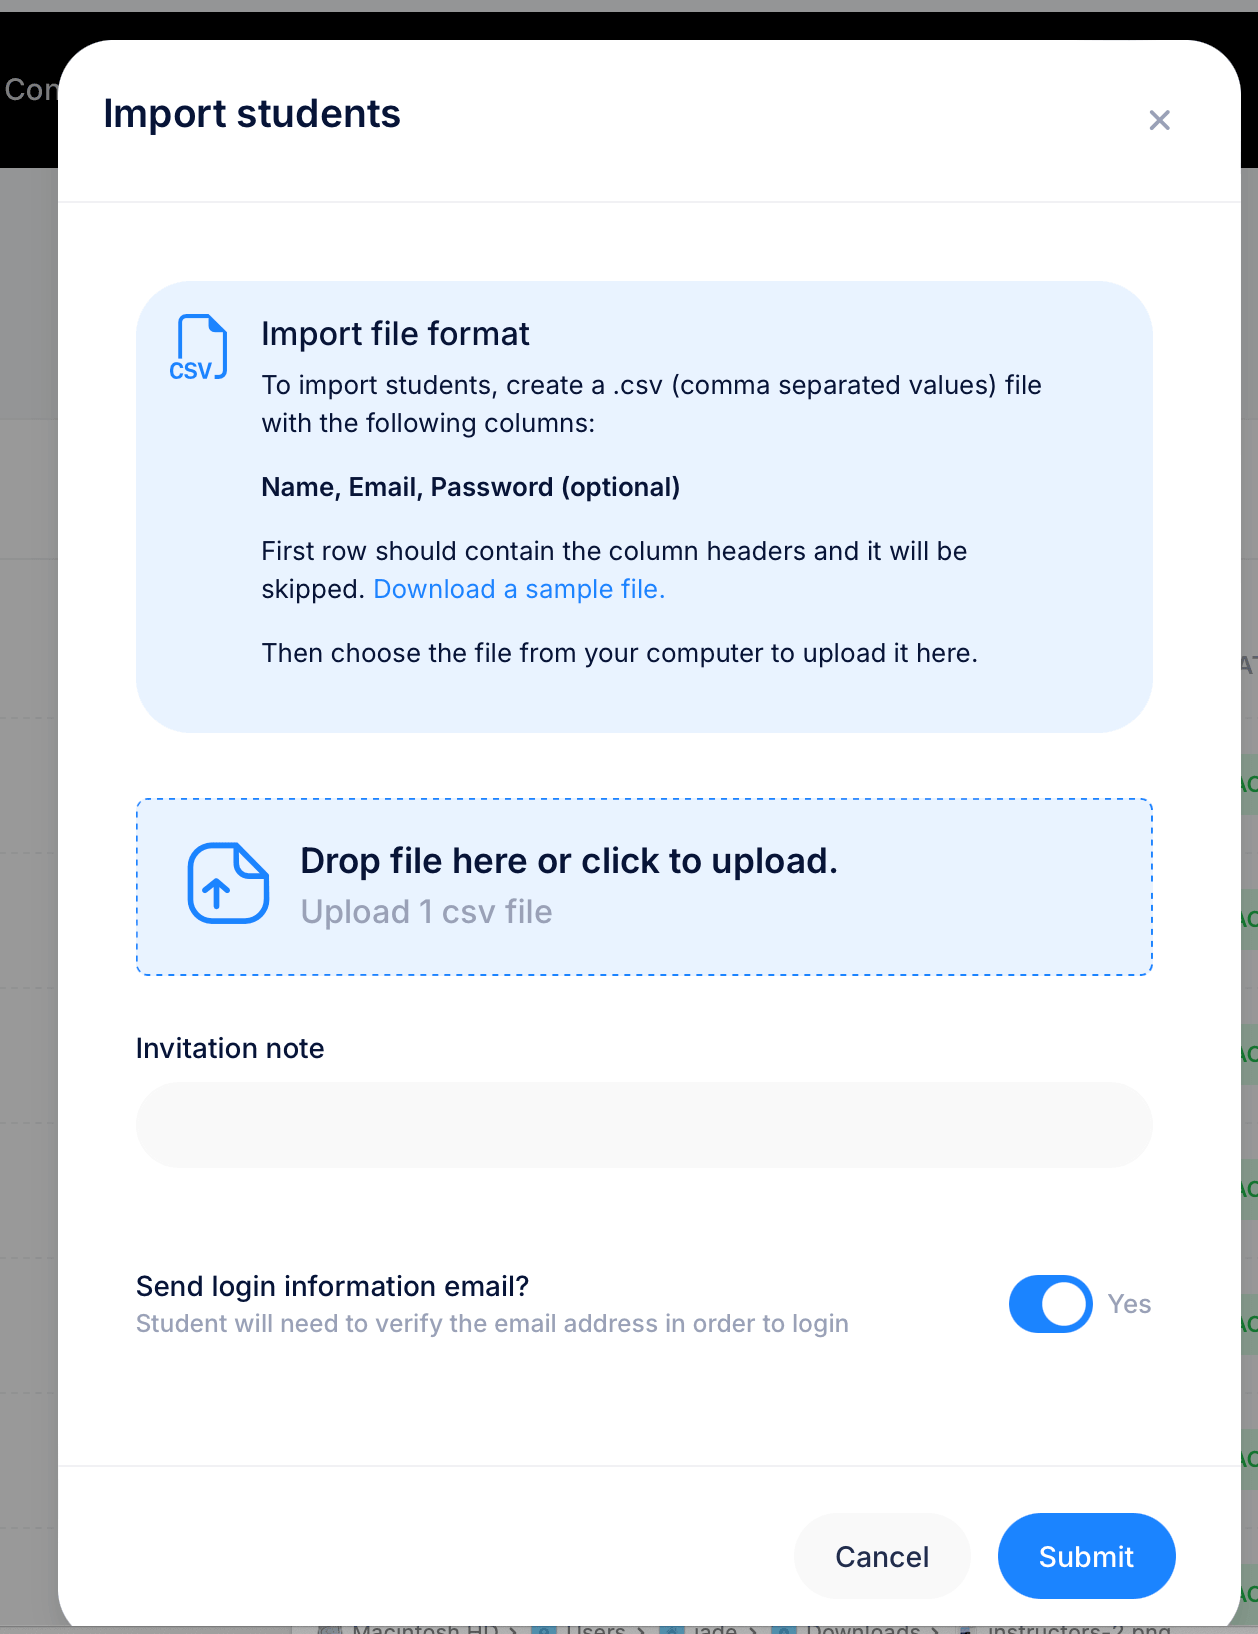
Click Import to bring in multiple students at once from a CSV file. The required columns are Name and Email, with Password as an optional third column, letting you set initial passwords in bulk. This is the only way to set a password during account creation, since the manual Add a Student form doesn't include a password field. The first row should contain these column headers and will be skipped during import. A sample file is available to download if you want a template to start from.
Once your file is ready, drag it into the upload area or click to browse and select it. The same Invitation note and Send login information email? options available when adding a student manually also appear here, applying to all students in the import at once.
Student self-enrollment
Students can also create their own accounts without any action on your part, as long as Student registration is turned on in Look & Feel > Website > Advanced. With it on, anyone who visits your portal URL can register themselves and get access.
Once registered, a student can land in one of two places depending on how your portal is set up: a course catalog where they can browse and enroll in available courses, or directly on a specific course or assessment you've shared a direct link to.
Self-registered students count toward your plan's student limit the same as manually added ones. If you're running a closed or internal portal and don't want open registration, turn off the Student registration toggle in Look & Feel to prevent anyone from signing up on their own.
Actions on a student
Click Actions next to any student to see three options:
- Edit — opens the student's profile to update their name, email, or other details
- Deactivate — suspends the student's access without deleting their account or enrollment history
- Delete — permanently removes the student's account
Tips
If you're adding a large group at once, the CSV import is significantly faster than adding students one by one and ensures consistent data entry across all accounts. Build your spreadsheet with the Name, Email, Password (optional) columns first, then export it as a CSV before importing.
Leave Send login information email on for most imports. Students who receive their login details directly are more likely to log in and engage with the course than those who have to wait for separate instructions from you.
Use Deactivate rather than Delete for students who have completed courses or exams you might need records of later. Deletion is permanent and removes their history along with their account.
The information icon next to an email address is a quick signal that a student may not be able to log in yet, useful for troubleshooting access issues before assuming the problem is elsewhere.
Related: Managing Students on a Course or Managing Students on an Assessment